
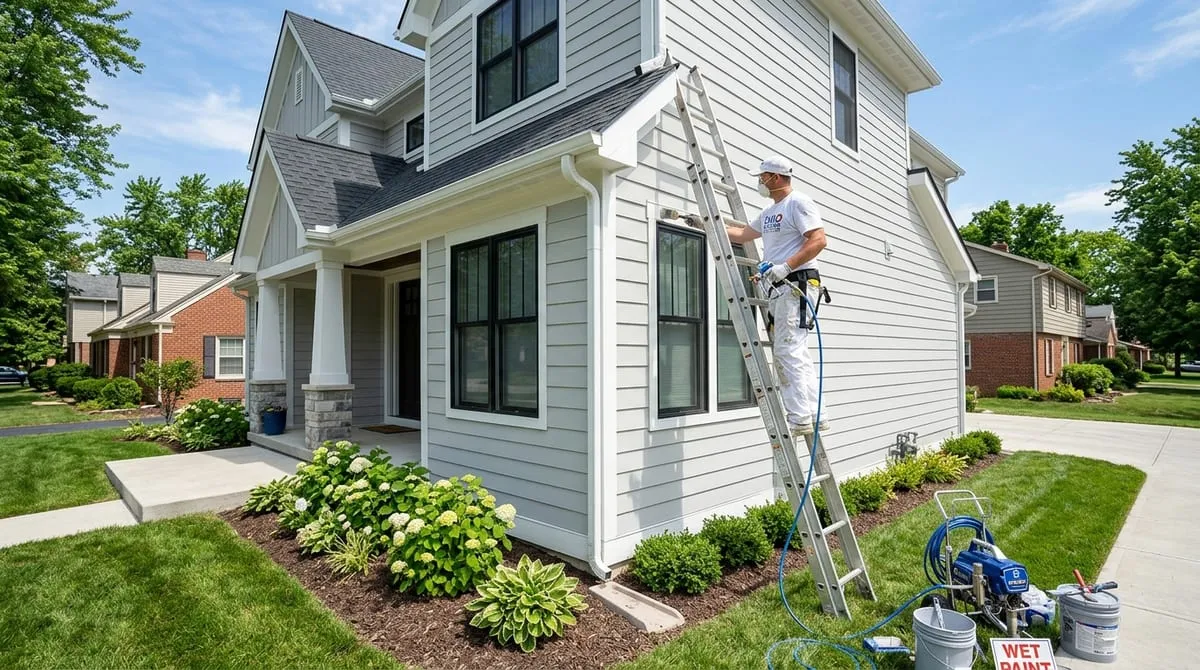
It is easy to view exterior house paint as purely aesthetic—a creative way to give your Ohio home a crisp color scheme or fresh neighborhood curb appeal.
In the reality of home maintenance, however, exterior paint is not primarily a decorative element; it is an engineered protective sacrificial skin.
Your siding and exterior wood trim—cedar clapboards, pine fascia, window casings, and porch pillars—are constantly bombarded by solar ultraviolet radiation, windblown rain, and fluctuating temperatures. Paint is the waterproof, UV-blocking barrier that shields raw wood fibers from the elements.
When that protective film breaks down, water quickly finds its way into the porous timber beneath. Left unchecked through several Midwest freeze-thaw cycles, trapped moisture turns minor cosmetic paint peeling into expensive wood rot.
Knowing when your exterior paint is reaching the end of its protective lifespan—and understanding why surface preparation dictates 80% of a paint job’s longevity—is vital for preserving your home.
Here is a craftsman’s look at the early warning signs of paint failure, the chemistry of modern coatings, and how to choose optimal weather windows for repainting in Ohio.
1. The 4 Early Warning Signs of Coating Failure
Too many homeowners wait until large sheets of paint are flaking off and falling into the mulch before calling a painter. By that stage, moisture has already penetrated the wood substrate, requiring extensive scraping, sanding, and potential carpentry replacement.
Experienced painters look for subtle indicators of breakdown long before visible peeling occurs:
PROGRESSION OF EXTERIOR PAINT FAILURE
Chalking Pigment binder degrades under solar UV; leaves powdery residue when rubbed.
Hairline Crazing Micro-fissures develop across surface; water begins migrating beneath coating.
Caulk Shrinkage Joints around window casings and corners dry out, pull loose, and form gaps.
Flaking / Peel Paint loses mechanical adhesion; raw wood is exposed to open weather.
1. The “Chalking” Test
Walk over to the south- or west-facing side of your house (the sides receiving the strongest afternoon sun) and run your dry fingers firmly across the siding:
- If a chalky, colored powder rubs off on your fingertips, the paint’s resin binders have broken down under ultraviolet radiation.
- While the wall may still look acceptable from the street, chalking indicates that the outer layer is thinning and losing its moisture resistance.
2. Hairline Alligatoring and Micro-Fissures
When paint is exposed to dozens of temperature swings, the coating gradually loses its flexibility. Look closely at south-facing window sills and horizontal trim boards. If you see a tight web of tiny hairline cracks (resembling the pattern of alligator hide), water is beginning to seep beneath the paint film.
3. Splitting and Failing Caulk Lines
Paint rarely fails in the center of an open board first; it fails at joints. Inspect the vertical seams where siding meets corner boards, window trim, and door frames:
- Has the caulk bead dried up, pulled away, or cracked?
- Open caulk lines create a funnel that catches wind-driven rain and channels it directly behind the siding boards.
4. Peeling Along Bottom Drip Edges
Look at the bottom horizontal edges of your siding boards and window sills. Because gravity pulls water droplets down to these edges, water tends to cling to bottom lips before dripping off. If you see curled paint flakes along bottom edges, moisture is being wicked upward into the end grain of the wood.
2. The 80/20 Rule: Why Prep Work Determines Longevity
In the professional painting trade, there is an undisputed rule: 80% of the longevity of a paint job is decided before a single gallon of finish paint is ever opened.
Anyone can take a brush and roll fresh paint over an old wall. But if you apply premium paint over loose paint flakes, chalky surfaces, or damp wood, that new paint will bubble and peel within a season or two.
| Preparation Step | Trade Standard Procedure | Why It Matters in Ohio |
|---|---|---|
| Pressure Washing | Gentle rinse with detergent wash | Clears airborne dirt, mold & chalk |
| Scraping | Hand scraping with carbide scrapers | Removes all non-bonded, loose flakes |
| Feather-Sanding | Sanding edges with 80-120 grit paper | Smooths transition between paint/wood |
| Spot-Priming | Slow-drying exterior alkyd/oil primer | Seals exposed raw wood fibers |
| Elastomeric Caulking | Premium flexible polyurethane sealant | Seals corner joints against wind rain |
Removing Loose Layers
All failing, cracked, or bubbling paint must be mechanically scraped down to sound, bare wood.
Feather-Sanding the Transitions
A scraped edge leaves a sharp, blunt ridge between the bare wood and the remaining sound paint. If unaddressed, that ridge catches water and looks jagged after painting. Professional painters use orbital or hand sanders to feather-sand those edges smooth, tapering the transition so water runs off smoothly.
Spot Priming Raw Wood
Bare exterior wood must never be coated directly with standard latex paint. Raw timber absorbs moisture rapidly and contains natural resins that can bleed through finish paint. An exterior oil-based or high-adhesion specialty acrylic primer is required to penetrate raw wood pores, seal tannins, and create a solid bonding foundation for the topcoat.
3. Coating Chemistry: Why 100% Acrylic Latex Dominates
When choosing exterior finish paint, product formulation makes a profound difference in surviving Midwest seasons.
In past decades, oil-based exterior paints were standard. While oil paint cured to a very hard surface, that hardness proved to be its undoing in cold climates: over time, oil paint turns brittle, cracking as wood expands and contracts.
MODERN RESIN PERFORMANCE IN MIDWEST
Uses inexpensive vinyl resins; turns brittle in winter; prone to flaking and fading.
High-grade acrylic polymers remain flexible; expands and contracts with wood movement; microporous matrix breathes out trapped vapor while shedding surface liquid water.
The Breathability Advantage
Wood is a hygroscopic material—it constantly breathes, absorbing and releasing microscopic atmospheric humidity.
- Modern 100% acrylic latex paints form a flexible, rubber-like film that expands when summer humidity swells wood and contracts during dry winter freezes.
- Crucially, acrylic films are microporous: they are tight enough to stop liquid rain droplets from entering from the outside, but permeable enough to allow tiny interior water vapor molecules to escape harmlessly without blowing bubbles under the paint film.
4. The Ohio Weather Window: Timing Your Project
You can use the finest paint and execute flawless preparation, but if paint is applied in adverse weather conditions, the chemical curing process will fail.
Exterior latex paints require a specific balance of temperature and humidity to form a durable film:
| Weather Condition | Ideal Range | Risk of Operating Outside Range |
|---|---|---|
| Ambient Temperature | 50°F to 85°F (Day and Night) | Freezing nights halt chemical curing |
| Relative Humidity | 40% to 70% | High humidity prevents water drying |
| Substrate Dryness | Moisture meter reading under 12-15% | Painting damp wood causes blistering |
| Direct Sunlight | Paint in the shade / follow the sun | Baking sun dries surface too quickly |
The Spring and Autumn “Dew Point” Trap
In Ohio, late spring and early autumn often seem like pleasant times to paint. However, pay close attention to overnight low temperatures:
- If you apply paint at 3:00 PM when it is 62 degrees, but temperatures drop to 36 degrees overnight before the paint has fully cured, morning condensation or heavy frost will disrupt film formation, causing premature dulling or peeling.
- Experienced painters follow the sun around the house, applying paint on walls that have warmed up and dried from morning dew, while avoiding walls baking in direct, blistering midday summer heat.
Frequently Asked Questions (Ohio Exterior Painting)
What visual signs indicate exterior house paint is losing its seal?
The earliest indicators are chalking (a colored powder coming off on your fingers), hairline cracks along window trim, shrinking caulk seams at corners, and minor paint peeling along the bottom drip edges of siding boards.
Why is surface scraping and sanding so vital before painting?
New paint cannot adhere to loose, flaking paint or chalky residue. Scraping removes failing material down to sound wood, while feather-sanding smooths the edges so water cannot pool behind the transition, ensuring the new coating bonds securely.
What is the best season to paint a house exterior in Ohio?
The optimal weather window in Ohio typically spans from late spring (after overnight frosts have passed and morning dew dries quickly) through early autumn. Painting requires ambient and surface temperatures consistently above 50°F during both day and night, with low humidity and no impending rain.
The Value of a Professional Exterior Assessment
Painting the exterior of an Ohio home is a major maintenance investment that protects your single largest asset.
It is not an undertaking where guesswork pays off. An experienced local painting craftsman will:
- Use electronic moisture meters to test wood dryness before applying coatings.
- Identify areas where failing caulk or roof drip edges are directing water behind siding.
- Recommend high-grade 100% acrylic formulations suited to your home’s unique sun exposure and architectural style.
Taking a measured, prep-first approach to exterior painting ensures your home looks stunning and stays shielded from Midwestern weather extremes for years to come.
Editorial Notice & Legal Disclaimer
Important Consumer Notice: This article is published strictly for general informational, perspective, and editorial opinion purposes. It is not designed to provide chemical engineering, structural timber, environmental safety (including lead-based paint remediation), or legal advice, nor is it intended to educate, instruct, or influence any homeowner's property maintenance or contracting decisions.
Exterior substrate condition, prior paint layer chemistry, sun orientation, and microclimate humidity levels vary considerably across homes. Older homes constructed prior to 1978 may contain lead-based coatings requiring EPA Lead-Safe Certified work practices during scraping or sanding. Home Services OH LLC does not inspect coatings, test for lead, perform paint applications, or warrant paint film lifespans. Property owners should consult directly with an independent, licensed, and insured local painting professional to physically inspect their exterior surfaces and verify safe preparation standards.
Ready to Protect and Beautify Your Home’s Exterior?
Preserve your siding and trim with professional preparation and durable exterior coatings. Connect with trusted, independent local painting professionals through Home Services OH.
👉 Request an In-Person Exterior Painting Evaluation
We connect Ohio homeowners with dedicated, independent local painting craftsmen who prioritize thorough prep work, clean job sites, and enduring finishes.