
Almost every homeowner across Ohio has encountered the frustrating eye-sore of a botched drywall patch.
Perhaps an electrician cut an access hole to fish wiring, a plumber repaired an upstairs pipe connection, or the kids played a bit too rough with a doorknob. The hole was filled, sanded down, and painted over—yet every afternoon when the sun streams in through the living room window at a low angle, that repair stands out like a beacon. You see a distinct hump, a rough perimeter outline, or a dull, chalky paint sheen that refuses to blend in.
Drywall finishing is one of the most deceptively demanding trades in residential construction. While hanging a sheet of gypsum board requires basic measuring and fastening, finishing joint compound to a flawless, invisible surface is a true tactile art.
Between Ohio’s severe seasonal humidity swings—which cause structural lumber to swell in July and contract in January—and natural house settling, walls and ceilings are constantly in subtle motion.
Here is an inside look at how professional drywall finishers feather compound, eliminate stubborn ceiling settlement cracks, match architectural spray textures, and prepare surfaces so repairs disappear completely into the surrounding wall.
1. The Anatomy of a Failed Patch: Why DIY Repairs Show
To understand how professionals create invisible seams, it helps to examine why quick DIY repairs so frequently remain noticeable:
WHY AMATEUR DRYWALL REPAIRS STAND OUT
Applying compound only over the hole, creating a raised mound that casts a shadow under light.
Painting directly over raw joint compound without primer; porous mud absorbs the paint, leaving a dull, chalky patch.
Leaving a smooth patch surrounded by an existing orange peel or knockdown wall texture.
Failing to feather compound edges out to an infinitesimal taper against the painted wall.
The Optical Illusion of Critical Lighting
Light rarely hits interior walls straight-on. In real-world homes in Mansfield, Canton, or Cleveland, sunlight enters from windows and sweeps across walls at a steep, glancing angle (what tradespeople call critical lighting).
Even a subtle rise of 1/32nd of an inch in the middle of a wall will cast a faint shadow on one side and catch a bright highlight on the other, instantly drawing the human eye.
2. The Art of Graduated Feathering
The secret to hiding a patch or drywall seam isn’t making it smaller—it is making it wider.
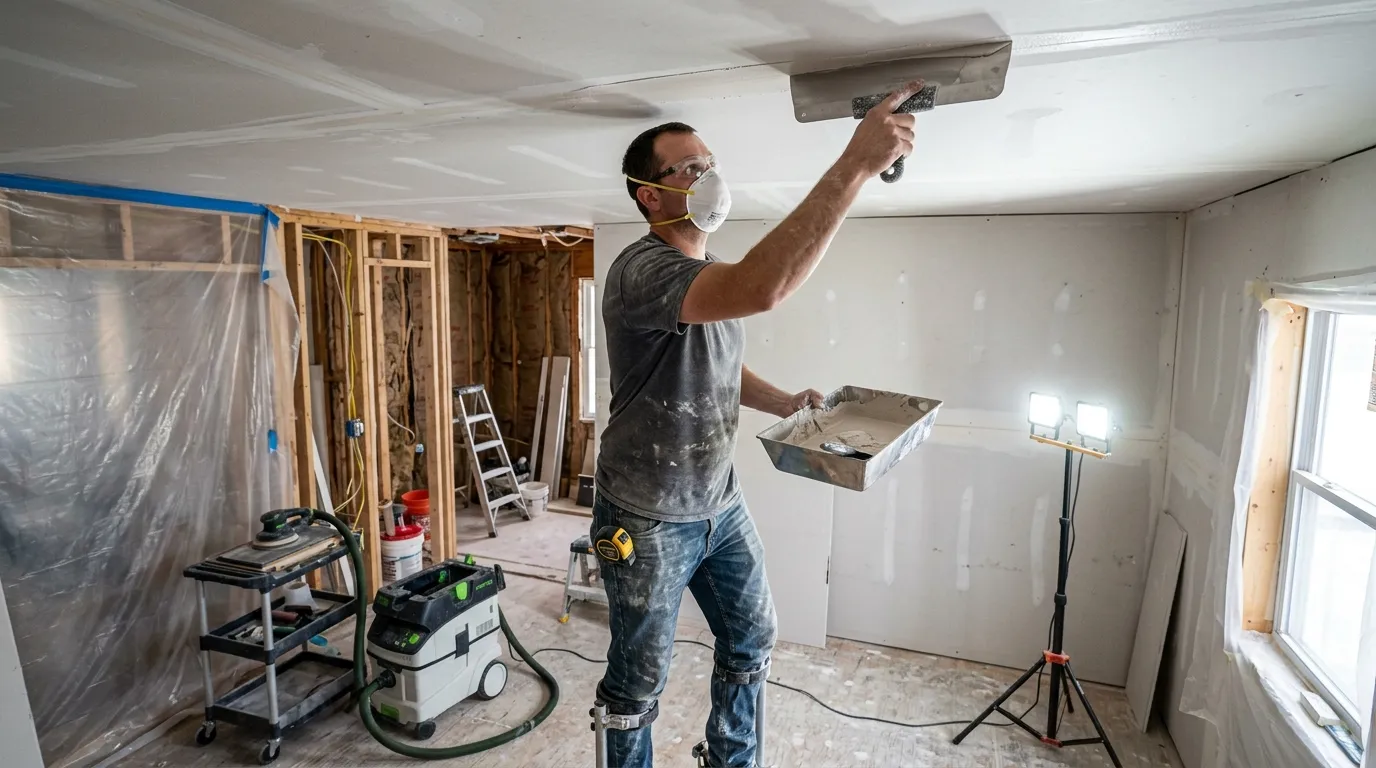
Professional drywall finishers use a sequence of progressively larger taping knives to distribute the thickness of the joint compound across a broad, gradual plane that the eye cannot detect:
| Pass Number | Taping Knife Width | Function in the Assembly |
|---|---|---|
| 1st Coat (Embed) | 5" or 6" Knife | Bed paper or mesh tape firmly in mud |
| 2nd Coat (Fill) | 8" or 10" Knife | Conceal tape edges; fill center hollow |
| 3rd Coat (Feather) | 12" or 14" Trowel | Taper edges 8-12" beyond repair zone |
The Knife Progression
- The First Coat (Bedding): Using a stiff 6-inch knife, joint compound is pressed into the seam or around the drywall patch. Paper or fiberglass mesh tape is embedded firmly, squeezing out excess compound so the tape sits as flat against the gypsum core as possible.
- The Second Coat (Filling): Once dry, a flexible 10-inch knife is used to spread a wider layer over the tape, feathering the compound several inches beyond the tape line.
- The Third Coat (Feathering): A wide 12-inch or 14-inch finishing knife (or curved curved drywall trowel) is drawn along the outer perimeters with firm pressure applied to the outside edge and lighter pressure toward the center. This feathers the joint compound down to an infinitesimal, transparent film against the existing painted wall, spanning twelve to twenty-four inches wide.
When sanded with fine-grit sanding sponges or pole sanders under bright inspection lighting, the transition from new compound to original painted wall is completely imperceptible to the touch.
3. Repairing Ceiling Cracks and "Screw Pops" in Ohio Homes
Few things frustrate Ohio homeowners more than a straight hairline crack running across a ceiling or small circular bumps pushing through the paint.
| Issue Observed | Root Structural Cause | Professional Solution |
|---|---|---|
| Screw / Nail Pops | Drywall fastener loosening as green lumber stud shrinks and expands | Drive new drywall screws 1.5" away; remove pop; re-tape and skim coat |
| Truss Uplift Crack | Cold winter attic trusses arching up while bottom chord stays warm | Install flexible ceiling trim or use slotted drywall ceiling clips |
| Corner Tape Pull-Away | House settling or improper corner bed | Cut out loose paper; re-tape with metal-reinforced composite tape |
Understanding Seasonal “Truss Uplift”
In homes built with engineered roof trusses, a common winter phenomenon is truss uplift.
During freezing months, the top chords of roof trusses in the cold attic absorb moisture and expand, while the bottom chord resting buried beneath ceiling insulation remains warm and dry. This temperature and moisture differential causes the truss to arch slightly upward at its center, lifting the ceiling drywall away from interior partition walls and creating a clean horizontal crack along the corner seam.
Simply smearing spackle into this crack will fail the following winter. Experienced drywall trades address truss uplift by securing drywall correctly to top wall plates or using specialized corner clips that allow the ceiling framing to flex without cracking the finished drywall tape.
Fixing Stubborn Fastener Pops
When ceiling nails or screws push through drywall (creating a circular “pop”), simply hammering them back down is a temporary band-aid.
- The old fastener must be exposed and tightened or carefully removed.
- New drywall screws with bugle heads are driven into the structural framing approximately 1.5 to 2 inches above and below the original fastener pop.
- The new screws pull the drywall panel tight against the lumber stud, after which the dimpled indentations are skimmed with lightweight joint compound.
4. Matching Architectural Wall & Ceiling Textures
While smooth “Level 5” walls are common in newer contemporary homes, a vast number of Midwest residences feature textured ceilings and walls:
COMMON ARCHITECTURAL TEXTURE PROFILES
Fine, atomized droplet splatter resembling the dimpled surface of an orange skin.
Medium-to-large droplets sprayed onto the wall, allowed to set for 10-15 minutes, then flattened with a wide, flexible rubber knockdown blade.
Dimpled acoustic aggregate commonly applied in mid-to-late 20th-century ceiling construction.
The Challenge of Blending Spray Textures
Matching a texture patch requires deep practice. If you simply spray a localized aerosol can of texture directly onto a flat patch, you create a heavy, distinct circular “halo” where new texture sits stacked on top of old texture.
Experienced tradespeople use variable-orifice spray guns and test consistency on cardboard scraps first. They spray the patch while gently “feathering out” the overspray into the surrounding wall, frequently wiping the outer perimeter with a damp sponge before the compound dries to soften the transition border.
5. The Critical Final Step: Equalizing Porosity with High-Build Primer
Even a flawlessly sanded, completely flat drywall patch will look obvious after painting if the surface porosity isn’t equalized.
- Raw joint compound is highly porous and thirsty; it sucks the moisture and binding agents out of latex paint immediately.
- Surrounding painted drywall has an impermeable, sealed surface.
Applying two coats of finish paint directly over unprimed compound causes paint flashing: the patch looks flat and chalky while the rest of the wall retains its proper eggshell, satin, or semi-gloss sheen.
Applying a dedicated high-build drywall primer or specialized polyvinyl acetate (PVA) sealer creates an even, non-porous foundation. When topcoat paint is applied, light reflects uniformly across both the original wall and the newly restored area.
Frequently Asked Questions (Drywall and Ceiling Repair)
Why do DIY drywall repairs often show visible seams?
Amateur patches typically mound compound over the hole rather than feathering it across a wide, graduated plane with wide finishing knives. Furthermore, painting directly over raw compound without a dedicated primer causes the patch to absorb paint differently, leaving visible flash marks under sunlight.
How do professionals fix ceiling settlement cracks permanently?
Rather than applying surface spackle, tradespeople open the crack, remove loose or crumbled gypsum, embed paper or specialized mesh tape in setting-type compound, and feather it out twelve to eighteen inches on both sides before priming and blending with surrounding texture.
What primer is recommended before painting over drywall compound?
A high-build drywall primer or PVA (polyvinyl acetate) sealer is the industry standard. It seals the porous joint compound, equalizing surface absorption so that topcoat wall paint dries with a consistent color and uniform sheen.
The Value of an Experienced Drywall Specialist
While small nail holes from picture frames are simple weekend chores, larger drywall repairs—such as repairing ceiling water stains, closing plumbing access cuts, or blending wall textures—require specialized tools, seasoned technique, and patient craftsmanship.
An experienced local drywall tradesperson can blend repairs invisibly into your existing walls, match tricky spray textures with precision, and leave your home clean, smooth, and ready for fresh paint.
Editorial Notice & Legal Disclaimer
Important Consumer Notice: This article is published strictly for general informational, perspective, and editorial opinion purposes. It is not designed to provide structural engineering, architectural, safety, legal, or construction code advice, nor is it intended to educate, instruct, or influence any homeowner's repair or contracting decisions.
Wall settling lines, ceiling fractures, and fastener displacement often result from routine seasonal temperature shifts, lumber curing, or truss uplift, but can occasionally indicate deeper structural framing movements. The visual observations discussed herein do not constitute a formal structural assessment. Home Services OH LLC does not inspect drywall, repair wall systems, or warrant paint finishes directly. Homeowners should consult directly with an independent, licensed, and insured local drywall and remodeling tradesperson to evaluate framing stability and perform safe physical repairs.
Have Unsightly Wall Blemishes or Ceiling Cracks?
Restore your home’s walls and ceilings to a seamless, flawless finish. Connect with trusted, independent local drywall and plaster specialists through Home Services OH.
👉 Request an In-Person Flooring & Drywall Consultation
We connect Ohio homeowners with dedicated, independent local craftsmen who take pride in smooth lines, clean workspaces, and invisible repairs.